» Setting up Audio Loopback in an Ubuntu VM on Parallels
March 21, 2019 - 5 minute readIntroduction
Over the past few months, I have become the Dungeon Master for my online Dungeons & Dragons group. We currently use Roll20 as our Virtual Tabletop, D&D Beyond for character tracking, and Discord for voice chat.
Originally, I started out using the built-in jukebox on Roll20 for ambient and audio tracks but I wanted to have more control over my audio selection (especially since Roll20 has removed support for audio platforms such as SoundCloud in the past). After experimenting with different solutions, such as Discord bots, I came up with a “hacky” solution that gives me all the control I want.
Requirements
- Parallels
- Ubuntu-based distro - I am using Pop_OS!
- A second Discord account
Setup
Linux
Install your Ubuntu-based distro of choice on Parallels. Once the installation is complete, open up the terminal and run the following commands to make sure everything is up-to-date:
sudo apt update
sudo apt upgrade
Discord
Download Discord using the .deb package from the official Discord website. Once the .deb file is finished downloading, double click on it to install.
Open up Discord and sign into your second Discord account. Once signed in, open up the settings menu. There are a few audio tweaks we need to make here in order for our audio to play back correctly.
Go ahead and click on the Voice and Audio section on the left-hand side. Scroll down a bit and toggle the following options:
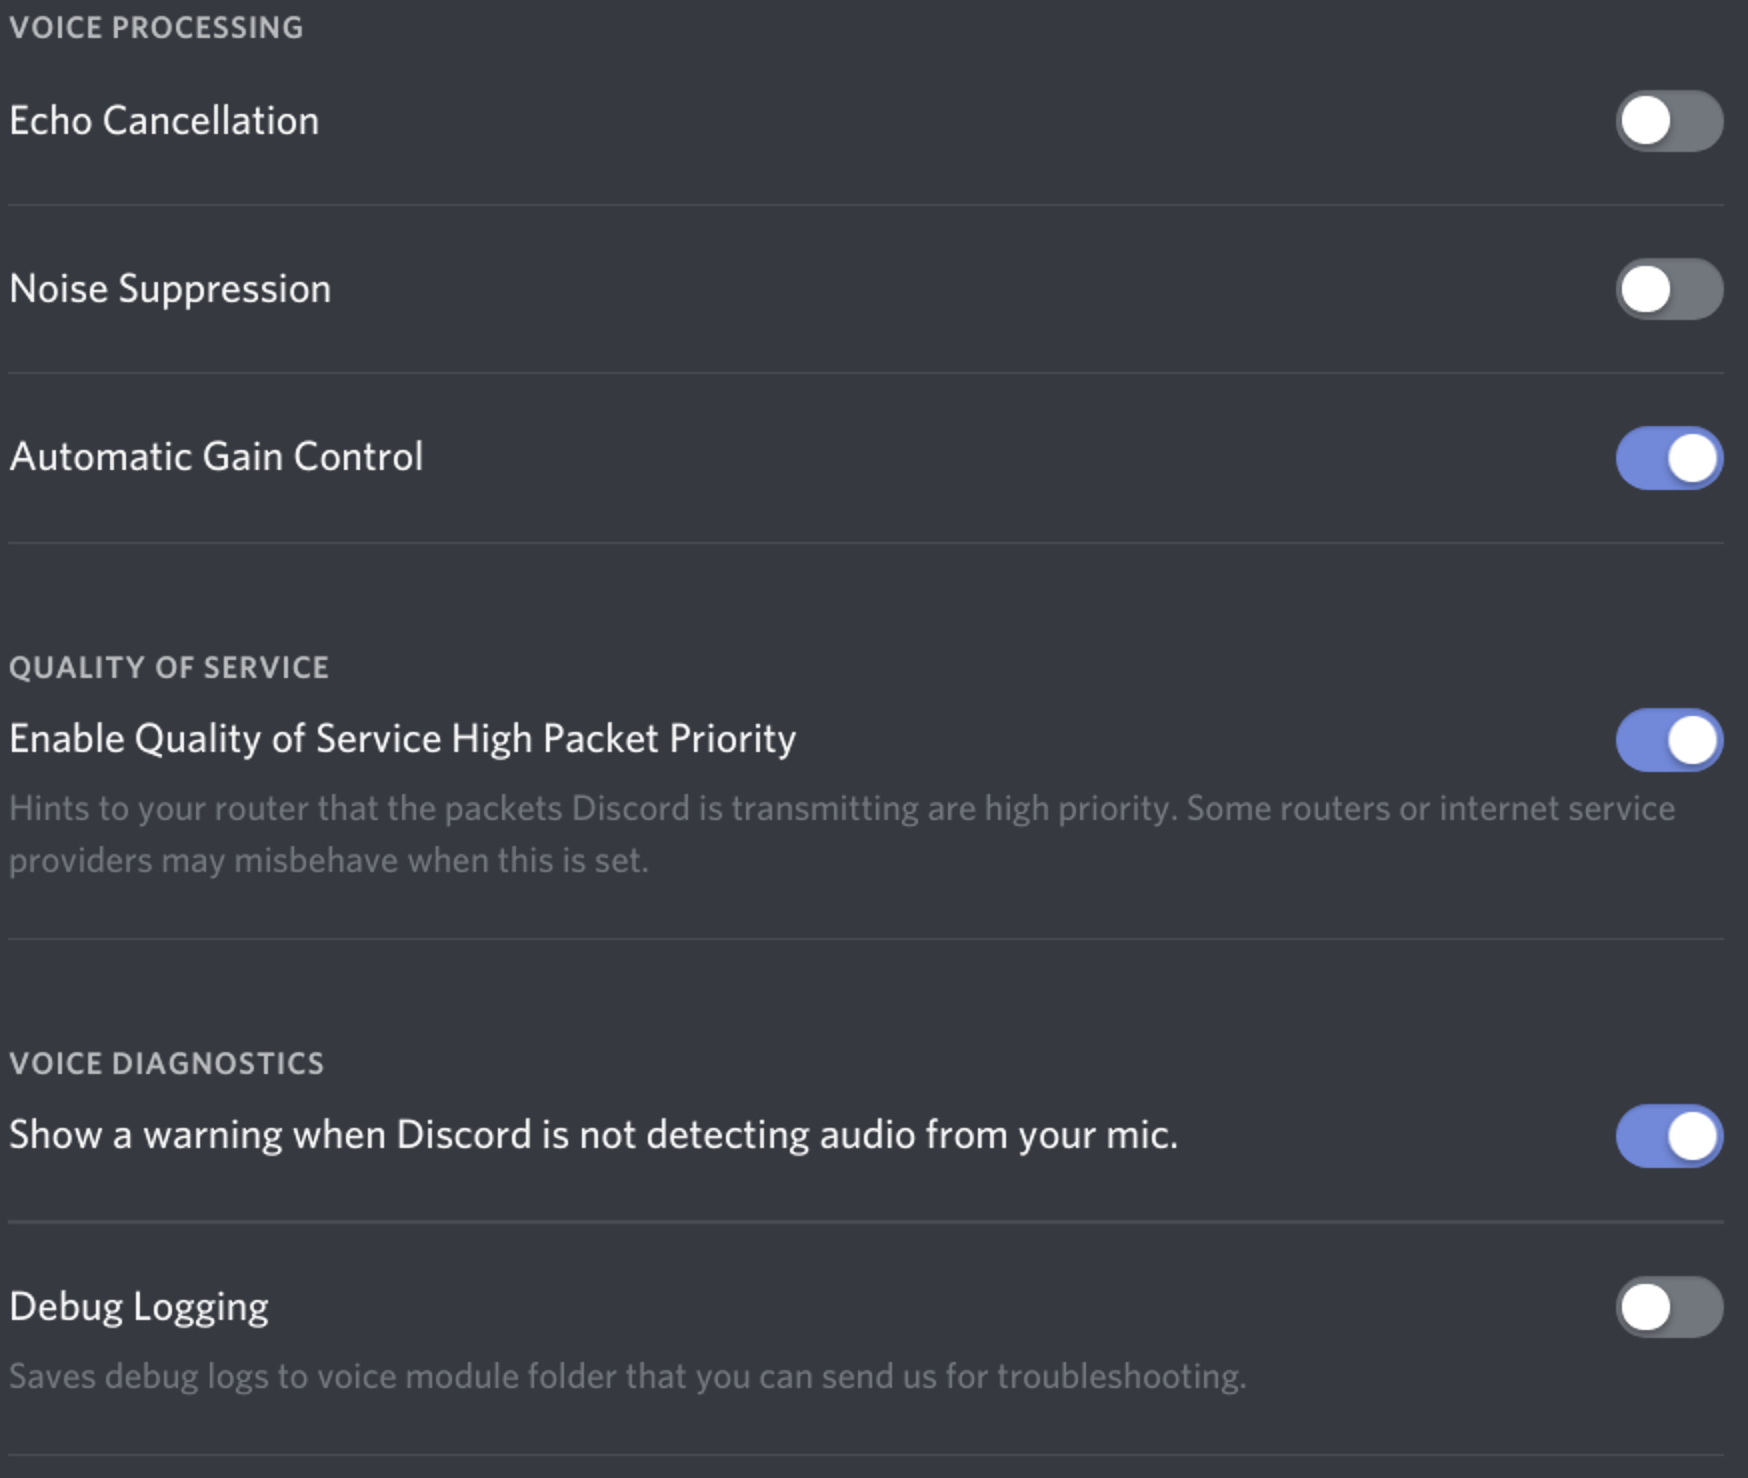
This will prevent Discord from trying to “correct” the audio we are going to be looping into it.
Scroll back to the top of the section and configure the Voice Settings like this:
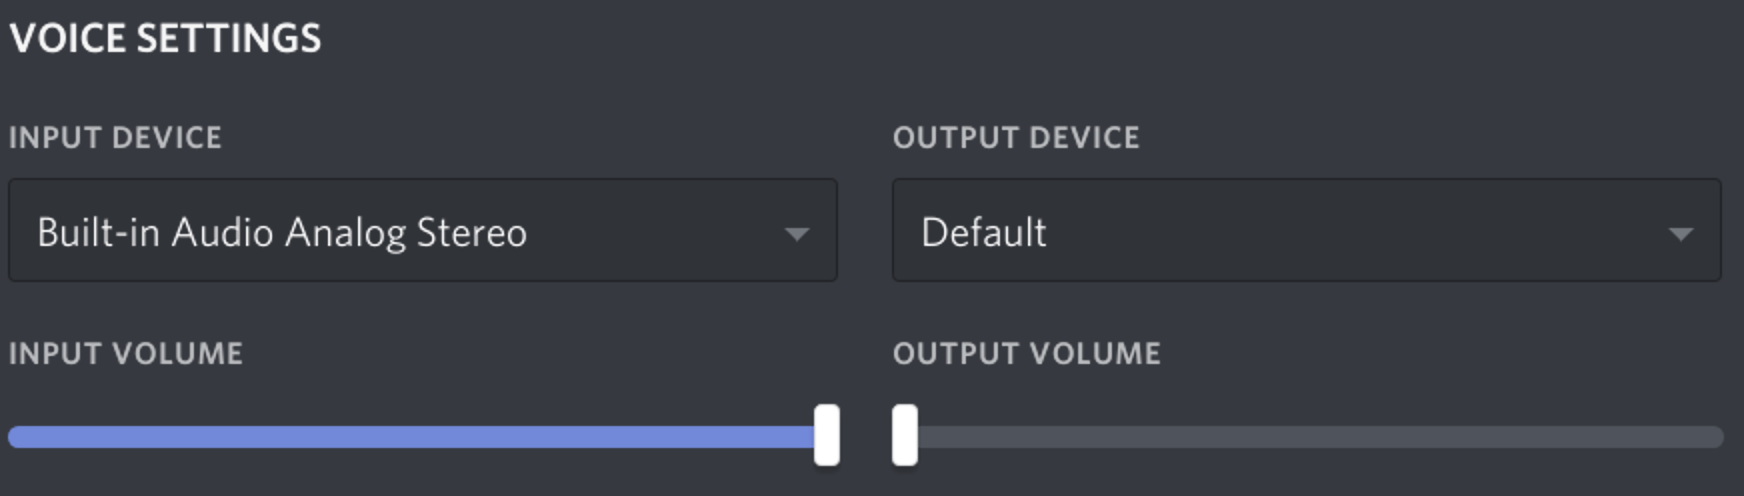
This will prevent you from hearing your own mic input once everything is configured.
For convenience, you can click on the Linux Settings section and toggle the following options:
- Open Discord
- Minimize to Tray
PulseAudio Volume Control
Open up the terminal and install PulseAudio Volume Control using the following command:
sudo apt install pavucontrol
Once installed, go ahead and launch it.
Across the top of the program there are several different tabs. Click on the Configuration one. There is a dropdown menu with several different audio profiles, the one we want to select is called Analog Surround 5.1 + Analog Stereo Input.
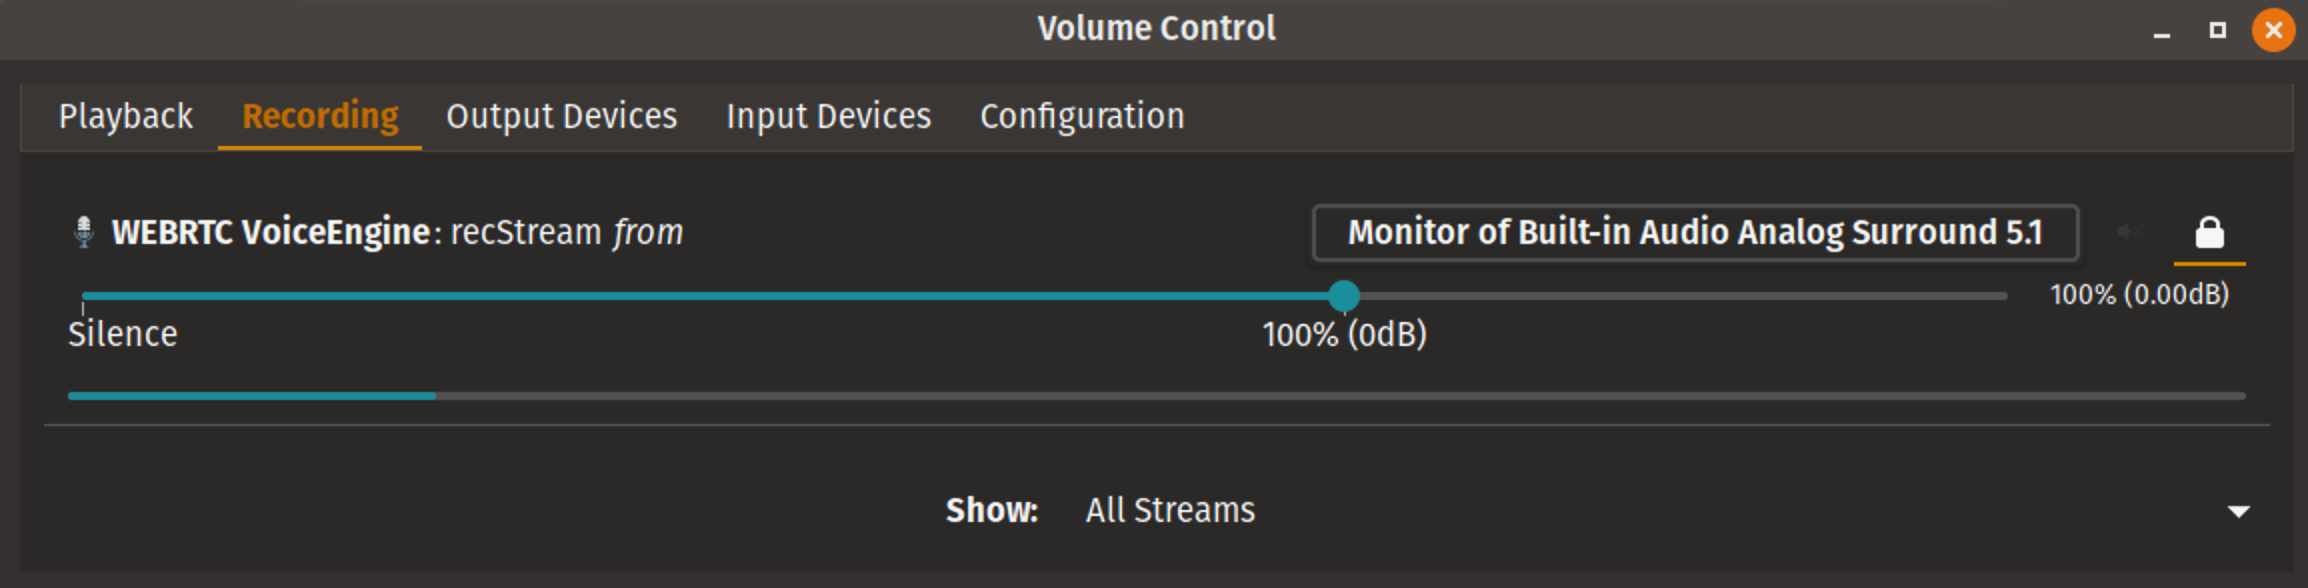
Click on the Recording tab. At the very bottom of the window, click on the dropdown menu next to Show and select All Streams. We then want to select the dropdown menu to the right of WEBRTC VoiceEngine and change what we are monitoring to Monitor of Built-in Audio Analog Surround 5.1.
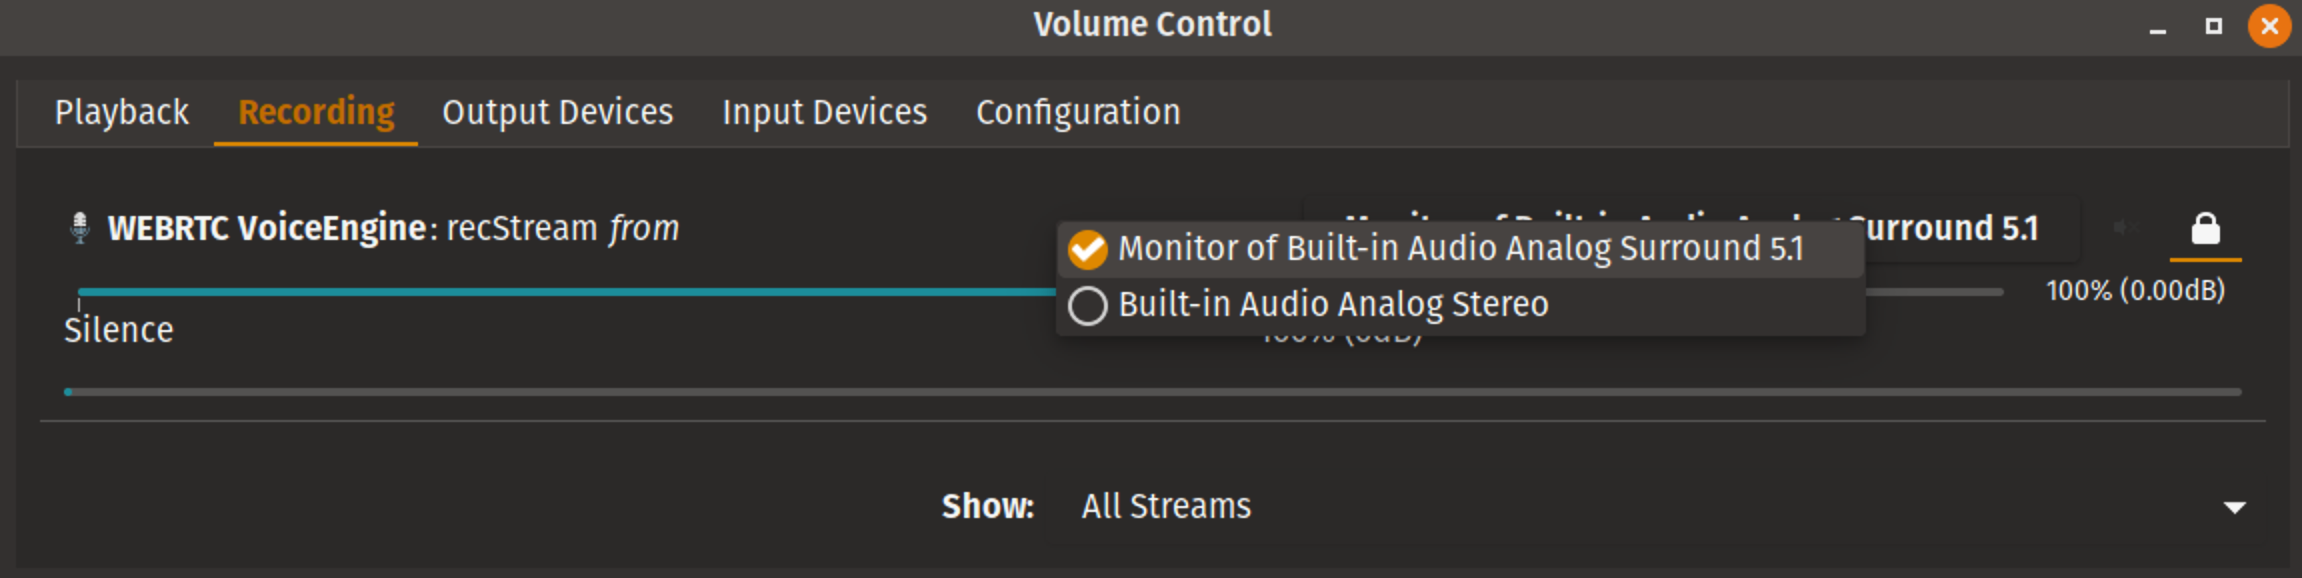
Every time the VM reboots you will need to change the dropdown next to “WEBRTC VoiceEngine”
Parallels
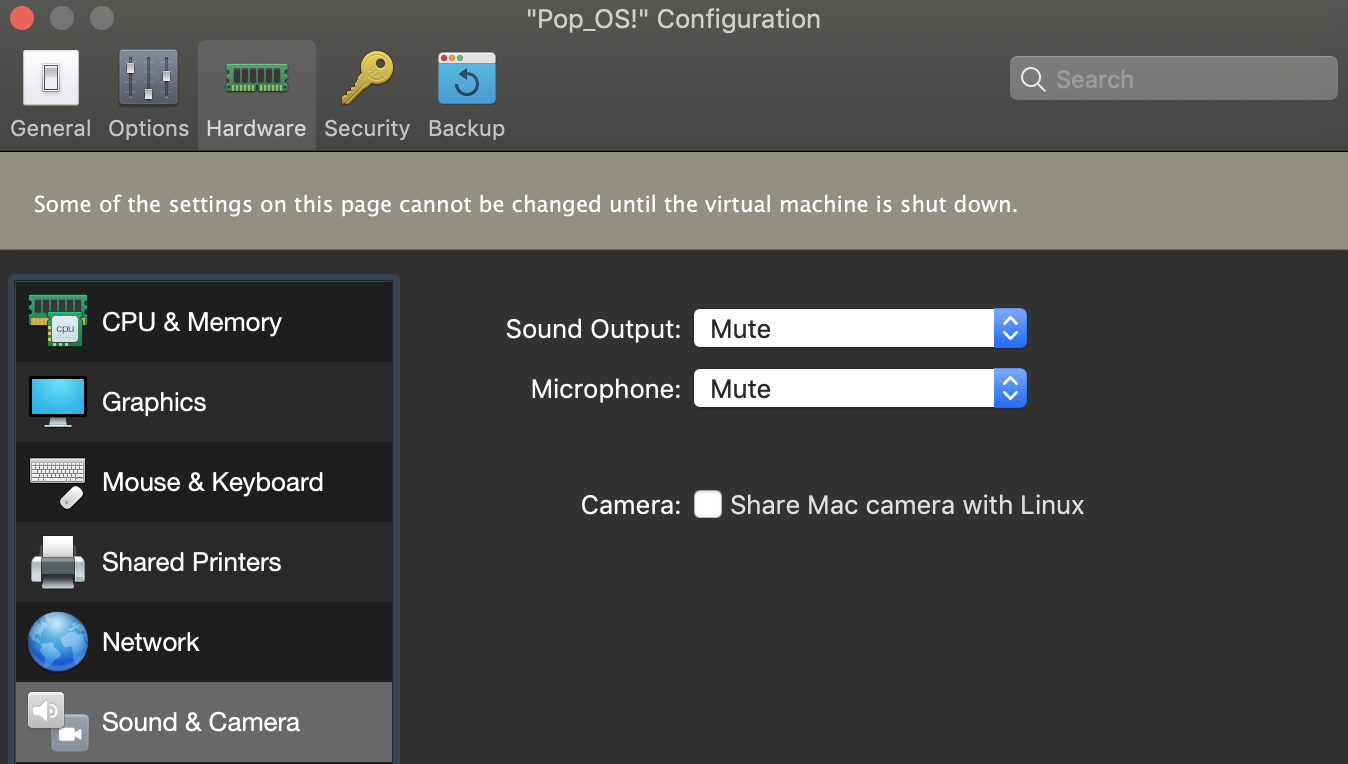
In Parallels, open the configuration window and go to the Hardware tab. On the left-hand side click on Sound & Camera and set both Sound Output and Microphone to Mute. This will prevent your VM from hearing microphone input and from passing off audio to your speakers, but this will allow you to adjust the volume inside of the VM.
Testing the Setup
Go ahead and open up a YouTube video in your VM. You should see audio activity in PulseAudio Volume Control similar to this:
Join a Discord voice channel with your second account inside the VM and join the same voice channel with your original account outside of the VM.
Make sure you can hear the YouTube video being played back on your original Discord account. If you hear audio, congratulations you are done!
Depending on the scene my group is in, I play audio from multiple sources such as Spotify, YouTube, and even Apple Music from the VM web browser.
Troubleshooting Issues
If you do not hear audio or it sounds “off” check the following:
- The system volume inside the VM, is it muted or too low
- You may not be monitoring the correct audio stream in PulseAudio Volume Control
- The input device in Discord may be wrong
If you are still having issues, feel free to reach out to me and I’ll help where I can!