» HDR Settings for Acer XR382CQK
May 06, 2020 - 4 minute readIntroduction
After some experimentation and Google searching, I came up with the following settings and configurations to get the best HDR experience on my Acer XR382CQK monitor.
This guide assumes you are using the latest version of Windows 10 and a NVIDIA GPU.
NOTE: COLORS WILL LOOK WASHED OUT UNTIL THE VERY LAST STEP!
Monitor Configuration
- Change to HDR mode
- Set overdrive to Normal
- Brightness should be set to 100 (This is the backlight just improperly labeled)
That’s it for the monitor!
Windows 10 Configuration
NVIDIA Control Panel - Part 1
Open the NVIDIA Control Panel by right clicking on the Windows 10 desktop and clicking NVIDIA Control Panel.
Under Display -> Change resolution -> Resolution select 3840 x 1600 (native) and on the left under the Refresh rate dropdown select 75Hz.
Below the Resolution section change the option to Use NVIDIA color settings and pick the following options:
- Desktop color depth : Highest 32-bit
- Output color depth : 10 bpc
- Output color format :
- If using a display port select : YCbCr444
- If using HDMI select : YCbCr422
- Output dynamic range : Limited
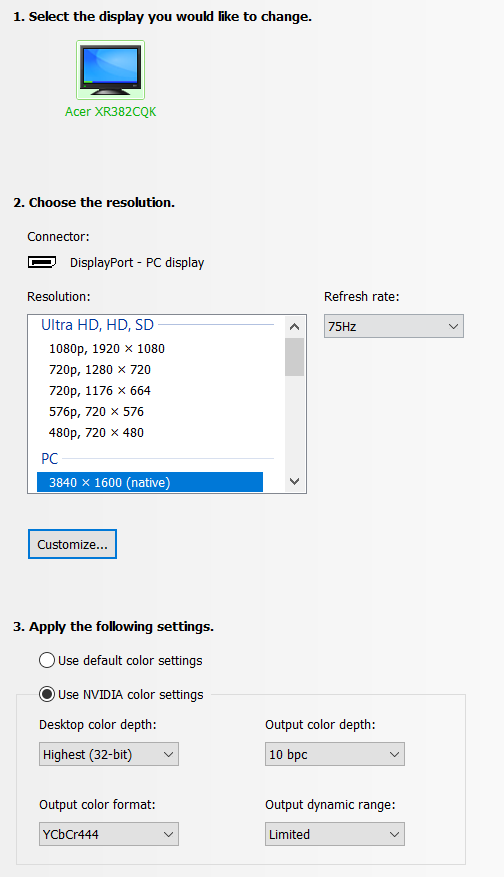
Click Apply and close the NVIDIA Control Panel.
Windows 10 Settings
Open the Windows 10 Settings by click the gear icon in the Start Menu, then click on System. Under Windows HD Color turn the Play HDR games and apps turn the option to On.
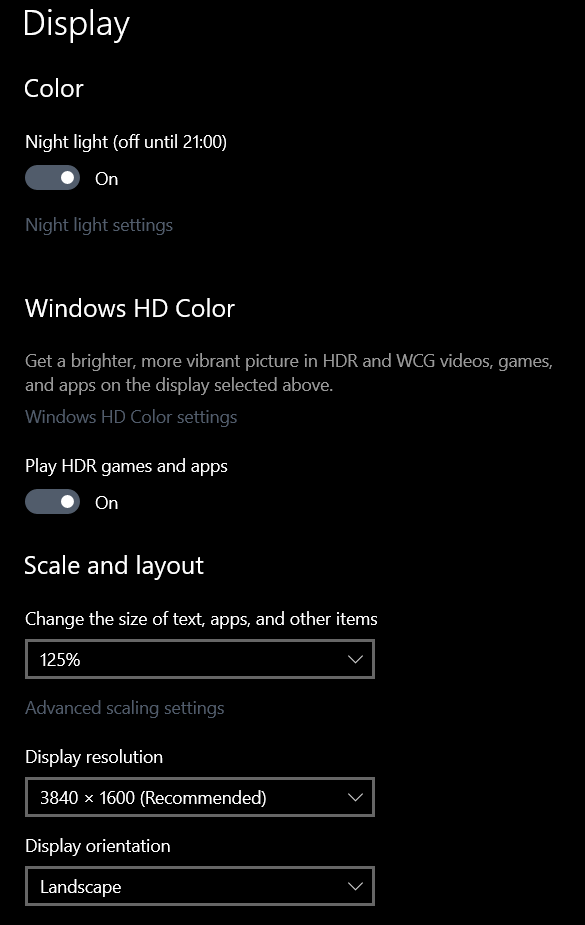
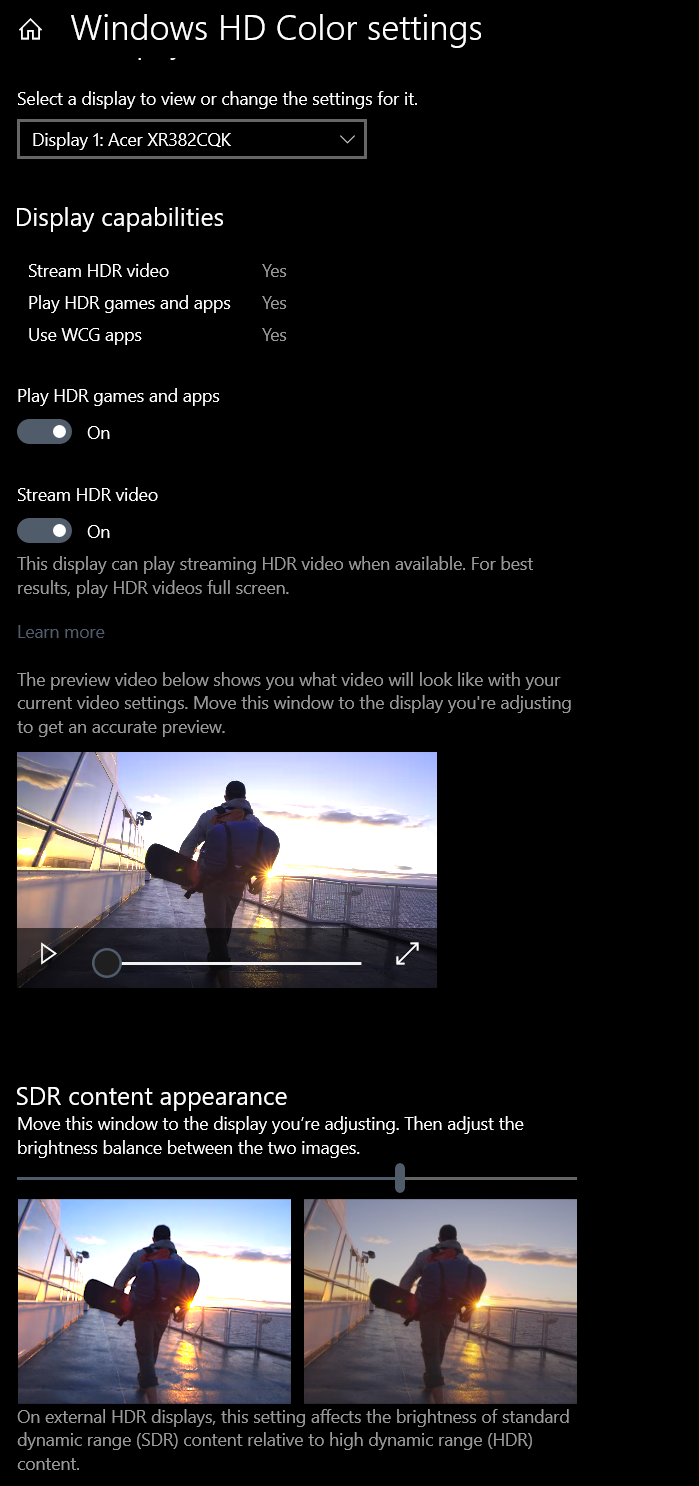
Click on Windows HD Color settings, under SDR content appearance move the slider to about 70%.
You can now close out of the Settings window.
Microsoft’s support of proper HDR support in Windows is still a mess and requires you to disable the native color settings by doing the following:
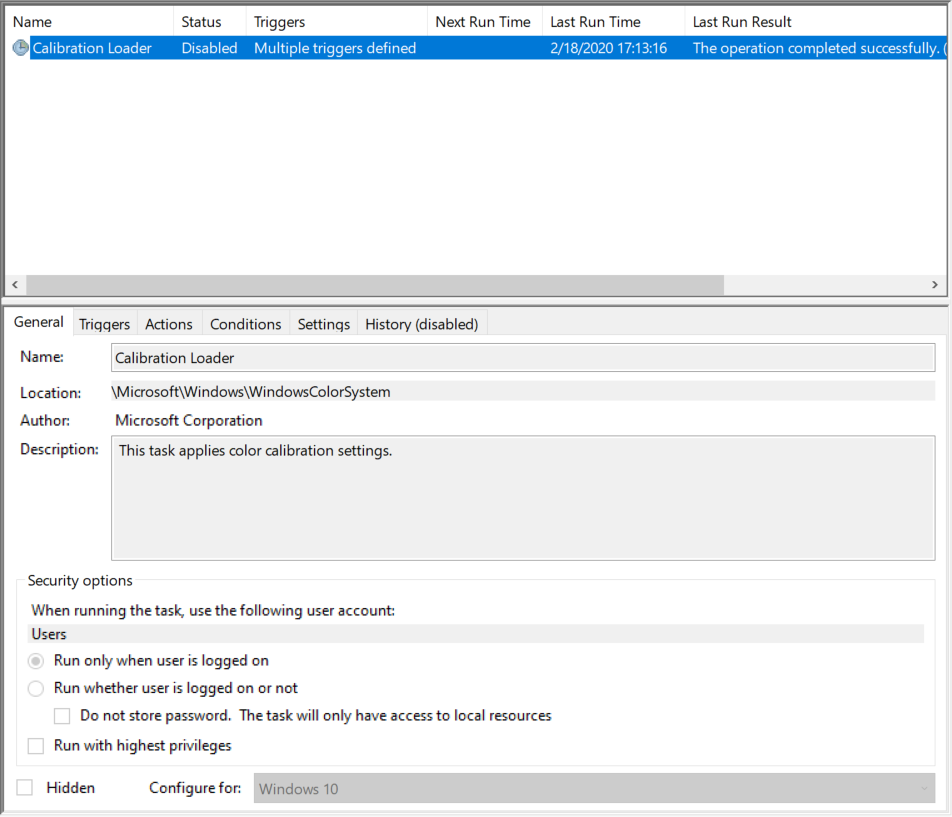
- Open the Task Scheduler by searching for it in the Start Menu
- Then under Task Scheduler Library navigate to
Microsoft/Windows/WindowsColorSystem - You should now see a task called Calibration Loader. Right click it and select Properties
- Across the top there are several tabs, select the one labeled Triggers tab in this new window There are two triggers here, At Log on and On connection to user session
- Disable them both by clicking on them, clicking Edit… and unchecking the Enabled box at the bottom of the window
- Do the above for both Triggers
You can now reboot the computer.
NVIDIA Control Panel - Part 2
Open the NVIDIA Control Panel again by right clicking on the Windows 10 desktop and clicking NVIDIA Control Panel.
Under Display -> Adjust desktop color settings, under the Choose how color is set section select Use NVIDIA settings.
Enter the following options for each section:
- Brightness : 37%
- Contrast : 100%
- Gamma : 1.00
- Digital Vibrance : 50%
- Hue : 0
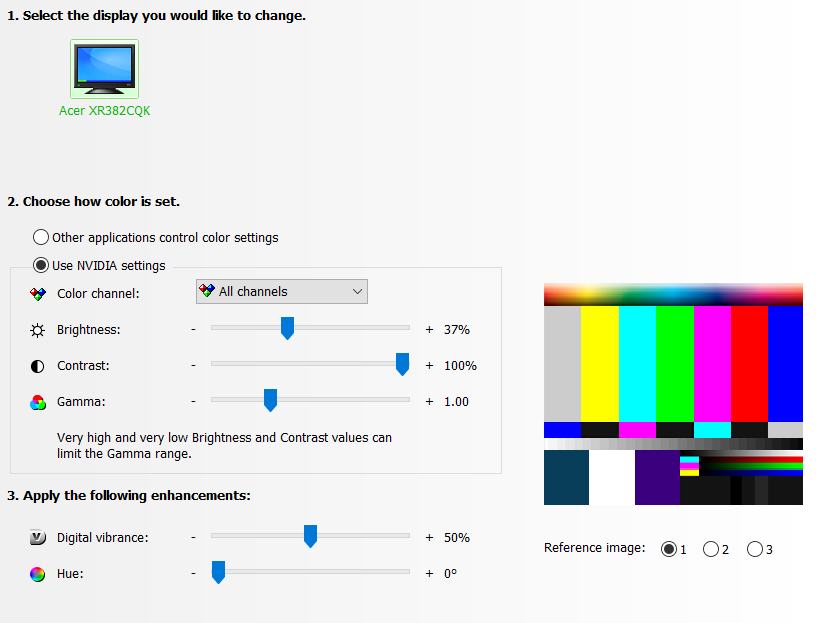
Apply it and close the NVIDIA Control Panel.
That is it! You should have a near perfect HDR experience on this monitor.
NOTE: You may need to re-apply these settings when there is a major NVIDIA or Windows 10 update.